Find your path through hunter marching in Hollow Knight: Silksong? Of all the parts I’ve written so far for this Hollow Knight: Silksong Walkthrough, I think Hunter’s March is the best. This area is filled with enemies of very unwelcome, spikes and dangerous ants. And if you don’t have the hang of pogoing from the enemy or surface yet, now is probably the time to really commit to learning that skill.
in Part 7 of the Silksong Walkthroughwe will introduce you to the safest and most optimal routes through the hunter march. This starts with the powerful ants guardian of the bone marrow and culminates in one of the most difficult battles deep in the chapel of the beast. Let’s get started!
Do you need a walkthrough in another area of the game? Check out Hollow Knight: Silksong Walkthrough Hub!
Hunter’s March Walkthrough Steps:
- Take Bellway to the bone marrow.
- Defeat the giant Ali Miniboss Skull Guard.
- Pogo your path towards the fleas that are being raised.
- Head east and reach the gauntlet with Shakura.
- Reach the next bench and disarm the trap.
- Meet Gilly at the dancer statue.
- Find patchy scarr in the secret passage.
- Unlocks shortcuts to deep docks.
- Enter the Beast Chapel.
- Defeat the savage beast.

1. Take Bellway to the bone marrow.
Picking up exactly where I left off, I’ve just entered the Greymore area, but I don’t really want to be here yet. Therefore, it drops almost all the way to the bottom of the shaft and uses the Bellway to move quickly to the bone marrow.

From there, head right until you reach a rather short shaft of the bone marrow that your step-in-law ladder runs through.
2. Defeat the giant Ali Miniboss Skull Guard.
The abdomen drops to ground level where it ends. To your right is the path that takes you to the hunter march, an area ruled by powerful ants enemies. But before heading there, drop the hole down and enter the prison (where Grandle was released) and rest on the bench there. This gives you an easy and quick path back to the hunter’s march.


When you’re ready, head down that passage to the right. And you’ll meet the still unknown mini boss (I know him because he’s skarrgard). This guy is extremely aggressive, hits for double damage and will definitely be torn apart if you’re not ready. I included a brief “How To Beat” video from a friend at IGN below.
Check out YouTube
The secret secret to defeating the scalar guard is to keep him close to him and dodge the rear as he swings or dodge under him as he leaps. They attack frequently, but attack carefully, as there are many opportunities to punish attacks. He doesn’t actually have very healthy so if you follow our walkthrough and have both the quick step ability and the coat of arms of the Wanderer, it shouldn’t take long (this attack makes this fight easier).
Once the giant ants are killed, collect some of the Shell Shard caches in the upper area just beyond the arena of Skull Guard before continuing on to the hunter’s march.
Warning before proceeding…
We highly recommend switching to Wanderer Crest in this area. Because, along with the new floating mechanics from farfield, it makes hunter marching very easy. However, with practice, you can use Hornet’s original Pogo attacks to clear all of the Hunter March, so that’s up to you.

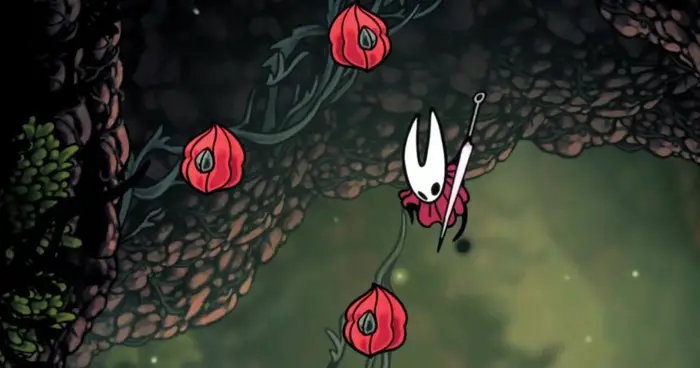
3. Follow the path towards captive chisels.

Pogo all the red plants until you follow the path and arrive at the vertical forks of the road. Raise the left-hand path up and avoid flying ants as you go.

At the top, fleas are kept past the spikes and inside the cage. Break the cage, release it, and send it back to the caravan. After that, carefully descend and go up the path on the right off-screen.
4. Head east and reach the gauntlet with Shakura.
In the next room, the pogo reaches the shelf on the left facing upwards. There are several rosary strings guarded by one patrol ants. Next, head right and kill or bypass the soldier ants in front of you. Pogo on a tall shelf and attack the rope to remove the rosary necklace.


Take your path even right (both paths are fine, but they will cause different obstacles) and enter the next room. With a pogo on the spikes, enter another gauntlet arena where a continuous wave of ant enemies attack you. But this is a little different. After the first wave, Mapmaker Shakura joins you.

Survive the Gauntlet – you can let her do most of the work and focus on dodging. Once the battle is over, talk to Shakura and buy the Hunter March Map for 70 Rosary.

5. Reach the next bench and disarm that trap.

After talking to Shakura, proceed to the right and another pogo filled with spikes enters the heavy area. Attack the web above to attack free silk and shoot the upper path for combat or take the lower path for pogong.
Once the path converges, look up and see the traces of red plants leading to the top. Climb there and note that when you reach the end, an ants will appear behind you. Kill the ants and attack the rope for some shell fragments.


Then drop down and continue to the right. There are three pressure plates on the ground throughout this stretch, so jump over them when you go. Otherwise, you will bump into swinging the bone axis. Get over the spikes at the edge of the room and go off-screen.
The next room is a vertical shaft with air currents. Place air above the shaft until you reach the first exit on the left.

There is a bench inside, but please don’t rest yet. He is trapped on the bench. By resting now, instead of healing you, the shaking x hit you.

Instead, you’ll go through the wall on the left to find a miniature hidden area with a lever to disarm the trap. now You can rest on the bench.
6. Meet Gilly at the dancer statue.
The wind flows and you return to the previous room and enter the room on the right opposite you. Here is a dancing statue, and right next to it is a plant that shuffles a bit.

Attack the plants and reveal the new NPC -Gilly. You can exchange some words with her about the statue and the entire area. Then go back to the previous room.
7. Find a patchy scarr in the secret passage.
Run even higher in the air and enter next to the left. This looks like a small room filled with strings of shell shards. But there’s far more to this room than it’s eye-opening.


Head towards the wall on the left where all the plantings are and jump into it. This reveals a well-hidden secret passageway filled with many intervention elements and pressure plate traps.
Go to the end – Whenever you see a jump that looks very large, hold the dash and do a running jump, then follow up another dash in the air. At the end of this secret realm, you will find a unique NPC known as the spotted scarr.

Talk to him, and although you cannot understand each other’s language, he will allow you to purchase some obscure items from his store. Curveclaw is a ranged boomerang-like attack tool and is suitable for flying enemies, but the destroyed mask is a tool that protects you from death (per rest).
It’s not very likely that you’ll have enough rosary at this stage at either stage, but if possible, buy a destroyed mask and equip it as soon as possible.
8. Unlock shortcuts to deep docks.

Get out the way you came, fall to the bottom of the vertical shaft and use air currents to slow down the descent before reaching the bottom spike. There are two exits – one to the left and the other to the right. Take the exit on the left.
Here you can attack the lever and open a handy shortcut on top of the deep dock. We still have what we need to do in the hunter march, so this time we’ll go back and take the right exit.

9. Enter the Beast Chapel.
Pogo over the spikes in the next room, then look for the grass pressure plate. It seduces you into a cage that is ready for the soldier ants ahead to drop onto you. Defeat the ants and push them forward.

As you pass the air current, you will find a small shelf on the right side of the room. There, the corpses of the enemy of the pilgrim are found in the hanging cage. Attacks the cage to destroy it and plunders the body for a memory rocket.

Now turn around and ride the air upwards towards the shelf facing upwards. Follow this path and continue to the end to find the entrance to a new building. This is the chapel of the beasts – and you should be very excited if you remember the rewards you received from the last chapel you visited.


10. Defeat the savage beast.
Within the chapel, turn the air up and head right (and try to ignore the intimidating throbbing sounds). The entire chapel is basically a parkour challenge, but there’s little to explain here. Just follow the air currents and red plants to circumference and descend.


After floating between the two walls of the spike, it jumps straight away from the ground below as it is about to collapse into the spike. Kill the enemy and immediately defeat them, then push them until they slide between several walls of the spike wall. Once you land, you will be flicking the lever on the right to open the shortcut, so you don’t have to go through that parkour section again.

Now head left. It’s time to play against one of the toughest bosses in Hollow Knight: Silksong’s early game.

This is a savage beast, and the final test of the hunter’s march at this stage. All of that attacks deal double damage to you, and its fee (both horizontal and vertical) is an offensive combo that keeps you moving.

Again, I highly recommend using Wanderer Crest for fast attacks. You need to maintain the pressure – every time you dodge an attack in the middle of that combo, just Dodging it, you’re close enough to go on a single retaliatory strike. Make sure you start charging near the wall every time you finish a horizontal combo by slamming it against the wall.

The worst part of this fight is the second phase. Because the savage beasts begin to call for reinforcements. The best strategy here is to feed any enemy that has created the beast to do floor slam attacks. Because it kills the minions right away.
Take your time and don’t give up. It’s a tough battle, but you can do it.
When the savage beast is finally killed, head left and claim your reward: the Beast’s crest. This crest gives the Hornet a powerful swipe slash attack, temporarily turning her binding into a lifestale attack ability.


However, it’s very different from before, so I recommend spending some time getting used to Hornet’s new rolling airroad downward attack. The coat of arms are automatically equipped, so you will have to leave the way you came with this new attack and return the red plants to the pogo, so there’s no doubt you’ll practice a bit beforehand.

For now, it’s all you do with the Hunter March! Next stop…well, you can find out by heading to part 8 of our Silk Song walkthrough!
(TagStoTranslate) Hollow Knight: Silksong (T) Action Adventure (T) Indie (T) Nintendo Switch (T) PC (T) Platformer (T) Team Cherry